Webhooks
- 6 Minutes to read
- Print
- DarkLight
- PDF
Webhooks
- 6 Minutes to read
- Print
- DarkLight
- PDF
Article summary
Did you find this summary helpful?
Thank you for your feedback!
Generic Webhooks in Retrace
Now you can integrate Retrace with the other tools in your DevOps arsenal. With the rise of interoperability and the sharing of data, Retrace’s Generic Webhook supports the delivery of alert notifications and newly discovered or regressed errors to external systems.
The Retrace Webhook implementation takes advantage of the notification engine that customers are already familiar with. Once configured, a webhook can be added to notification groups just like any other contact or Slack integration.
Instead of sending a preformatted email or text message, webhooks send a JSON payload representing the event that can be used by the consumer for any number of business processes.
One common usage of Alert webhooks is to create a Defect Ticket and/or Support escalation in an external application. Error webhooks could be used in a similar workflow to externally track new and regressed errors in your system.
Types of Webhooks
Creating a webhook integration is the same process for both usage scenarios. Creation of the static URL in Retrace in not affected by the intent of usage.
Retrace will allow a single webhook to be used for Alert and/or Error notifications. The payload delivered to the endpoint depends on how or where it is configured in a Notification Group. If the endpoint is capable of handling both types of payloads sending both types of messages to a single endpoint is an acceptable scenario.
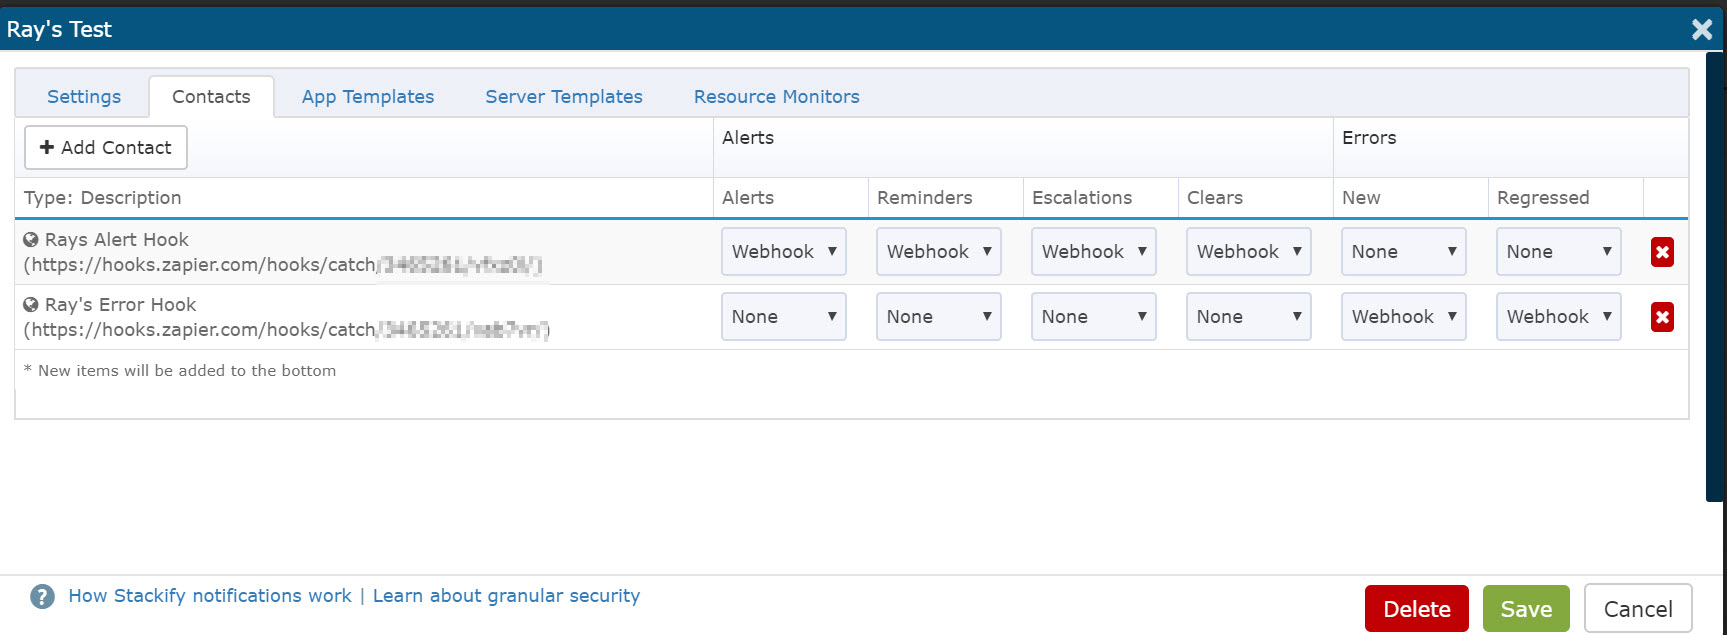
In the example above, two separate endpoints have been created and added to a notification group. Each endpoint has been configured to handle the specific payload for its intended usage.
Alert Webhooks
When an Alert is sent to a webhook, the following payload is posted.
Field Definition
- MonitorId - Stackify Monitor Internal ID
- DeviceId - Stackify Device Internal ID
- DeviceName - Device that produced the alert
- Name - Name of the Alert like “Error Rates: ApplicationName” or “Unhandled Exceptions”
- GroupName - Name of the Alert Group
- SourceName - Monitor Name that triggered the Alert - Example “SQL Timeouts”, “Monitor Misfires”, etc.
- ResultStatus - Result of the monitor execution
- AlertGroupId - Stackify Alert Group Internal ID
- AppName - App that produced the alert - Example “My Awesome Application”
- EnvironmentName - Environment Name of Alert - Example “Dev, QA or Production”
- StateName - State of Alert like HalfOpen, Open or Closed
- SeverityName - Severity of Alert like Warning, Critical or Outage
- Started - DateTime of when the alert was started
- Ended - DateTime of alert was ended
- EventType - Stackify Type of Alert (1=Alert, 2=Clear, 3=Reminder or 4=Escalated)
- TimeZoneId - Client Time Zone ID
- ProcessTime - DateTime when error was processed
- ObserveDst - Client daylight savings time observed
Example Payload
{
  "MonitorId": 12345,
  "DeviceName": "My Device",
  "GroupName": "External Web Site Check",
  "Name": "Website Check",
  "AppName": "My Awesome Application",
  "SourceName": "http://google.com (from My System)",
  "EventType": 1,
  "StateName": "Open",
  "TimeZoneId": 20,
  "ObserveDst": true,
  "Started": "2019-04-16T17:18:19.8590545+00:00",
  "SeverityName": "Warning",
  "Ended": null,
  "AlertGroupId": 12345,
  "DeviceId": 1234,
  "ProcessTime": "2019-04-16T17:18:24.3616871+00:00",
  "EnvironmentName": "My Environment",
  "ResultStatus": "200 - OK"
}
Errors Webhooks
When a New or Regressed Error is sent to a webhook, the following payload is posted.
Field Definition
- AppEnvId - Stackify App/Environment Internal ID
- AppNameId - Stackify App Internal ID
- ErrorGroupId - Stackify Error Group Internal ID
- DeviceName - Device that produced the error
- AppName - App that produced the error - Example “My Application”
- EnvironmentName - Environment where App was running - Example “Dev, QA or Production”
- Message - Message logged by error
- StackTrace - Entire Code Stack Trace
- Timestamp - DateTime the error was thrown
- Method - Code method that threw error like Foo.getName()
- ErrorType - The actual type of errors being triggered like System - TimeoutException, FileNotFoundException, etc -
- EventType - Stackify Type of Error (5=New, 6=Regressed)
- TimeZoneId - Client Time Zone ID
- ProcessTime - DateTime when error was processed
- ObserveDst - Client daylight savings time observed
Example Payload
{
  "TimeZoneId": 20,
  "EnvironmentName": "My Environment",
  "StackTrace": "Stack trace of the error",
  "DeviceName": "My Device Name",
  "AppName": "My Application",
  "ErrorGroupId": 12345,
  "EventType": 5,
  "ErrorType": "System.NullReferenceException",
  "AppEnvId": 12345,
  "ProcessTime": "2019-04-16T17:18:24.3616871+00:00",
  "AppNameId": 12345,
  "Timestamp": "2019-04-16T17:18:19.8746818+00:00",
  "Message": "System.NullReferenceException: Object reference not set to an instance of an object. ",
  "ObserveDst": true,
  "Method": "Foo.MyMethod()"
}
Creating Your Webhook Integration
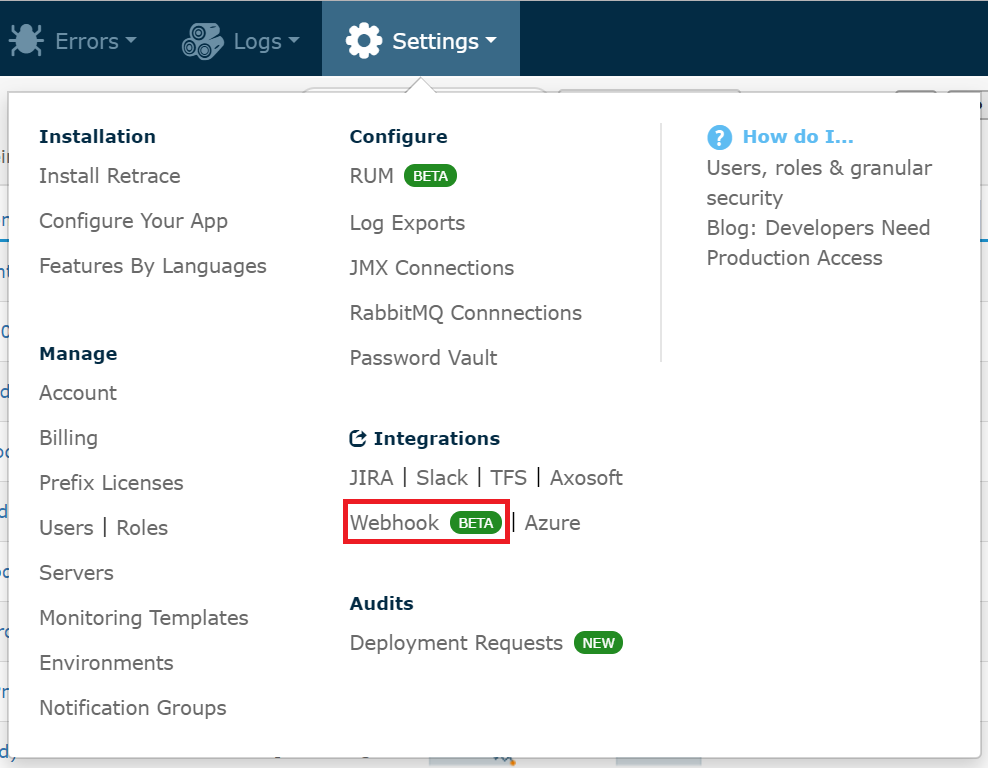
To set up the integration, log in to your account and click on the Settings tab as shown below. Under the Integrations section, click on the Webhook link.
This screen allows you to add new and manage your previously created webhooks. To create a new webhook, use the Add Webhook button.
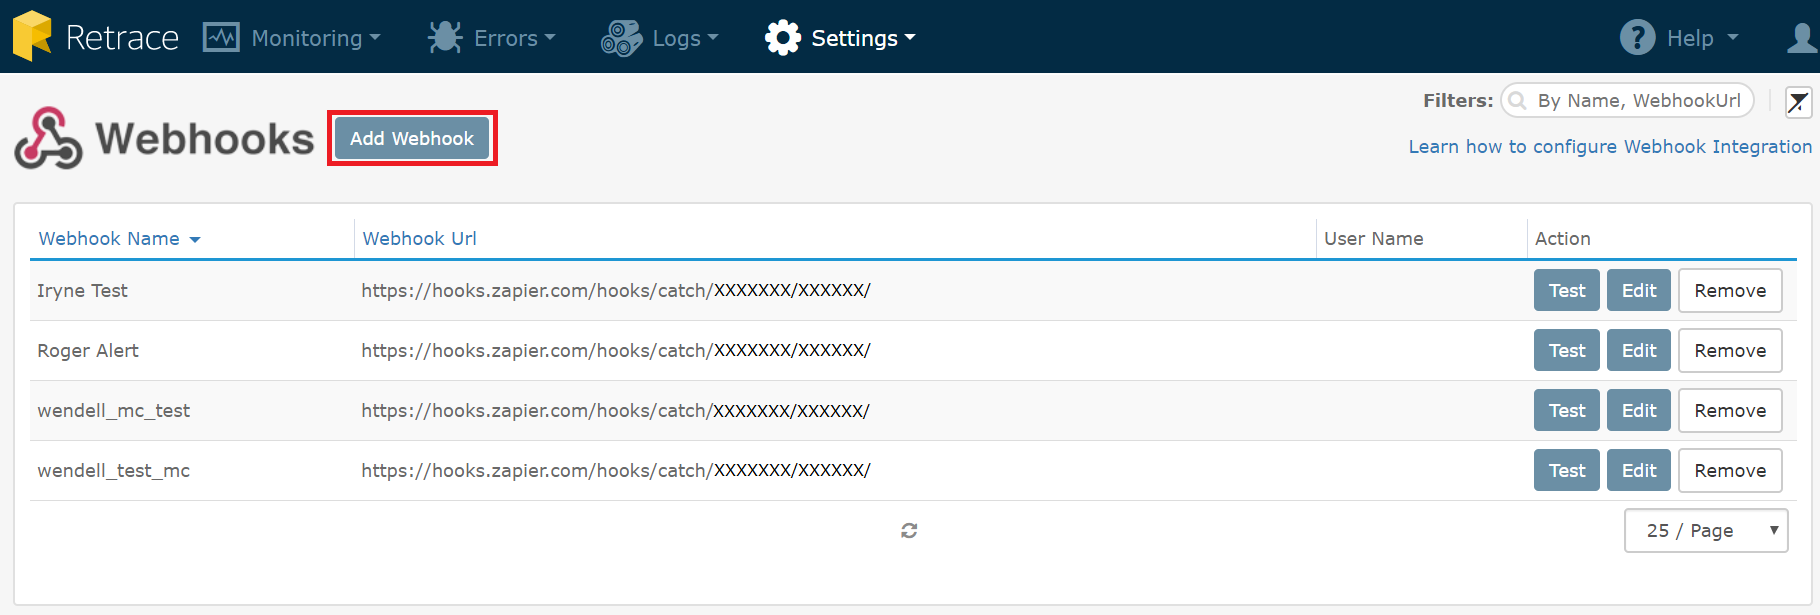
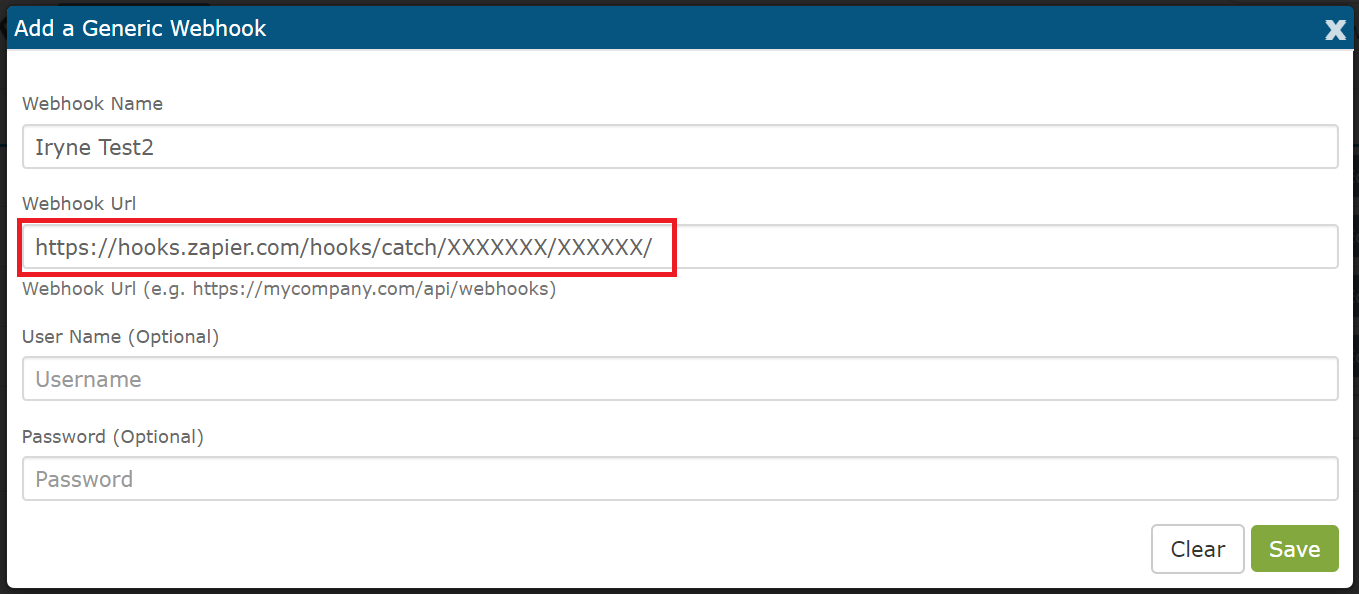
Enter a Webhook Name and URL. It is our best practice to include the intent in the name for ease of use when configuring the notification group.
Example Using Zapier
Zapier is a popular platform that facilitates integration of disparate systems through configurable mapping. Users can set up an incoming hook in Zapier and route the action to some other system.
Step 1: Make a Zap (Webhook)
- Create an account if you are new to Zapier
- Click the Make a Zap! button
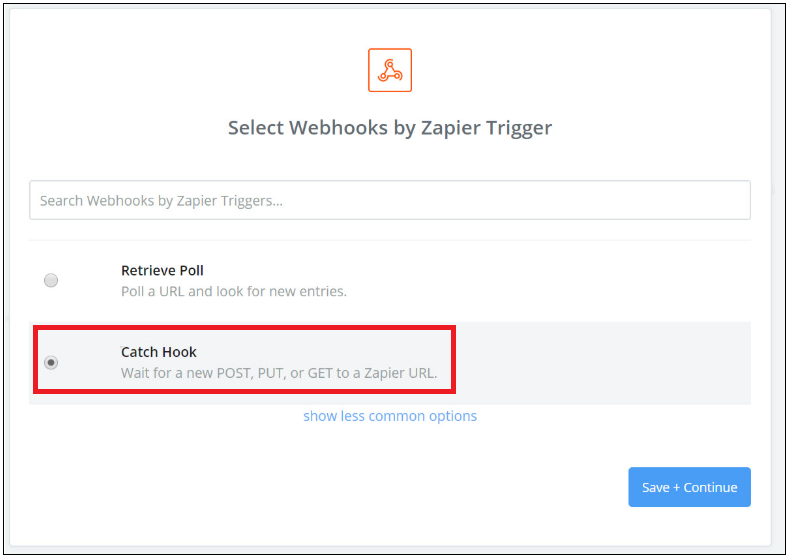
- Select Webhooks as the Trigger App
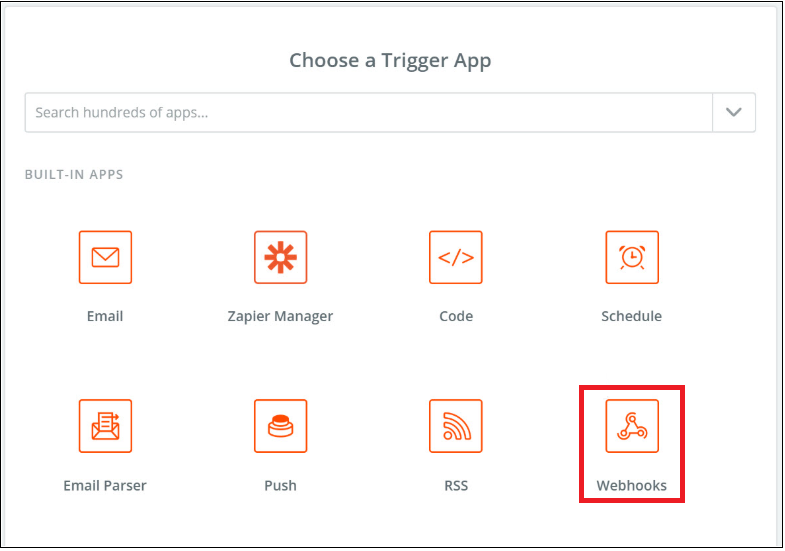
- Select Catch Hook as the Trigger
- Copy the newly created webhook address. This will be used within Retrace to direct the notifications
- Zapier now wants to receive an example payload to assist you later in the mapping step
- Either post an example payload above to the new endpoint
-or-
Select Skip This Step since the mapping is already known
- Either post an example payload above to the new endpoint

Step 2: Use Zapier Webhook URL
- The Webhook address created by Zapier is to be used in Retrace as the Webhook URL
Step 3: Configure Zapier Action
The final step in Zapier is to determine the destination system and map the fields. Many software products have pre-built integrations that facilitate this process.
When mapping the output from Retrace into the Zapier action, simply surround the field names with double braces like {{This}}. When Zapier receives an incoming post, it will replace the {{This}} with the contents of the JSON field This if it exists.
As an example, you can link Zapier to a Google Drive account and create a new text document that details an alert. Paste the following text into the “File Content” section of the Google Drive integration to start capturing Alerts as Documents in Google Drive.
  MonitorId - {{MonitorId}}
  DeviceName - {{DeviceName}}
  GroupName - {{GroupName}}
  Name - {{Name}}
  AppName - {{AppName}}
  SourceName - {{SourceName}}
  EventType - {{EventType}}
  StateName - {{StateName}}
  TimeZoneId - {{TimeZoneId}}
  ObserveDst - {{ObserveDst}}
  Started - {{Started}}
  SeverityName - {{SeverityName}}
  Ended - {{Ended}}
  AlertGroupId - {{AlertGroupId}}
  DeviceId - {{DeviceId}}
  ProcessTime - {{ProcessTime}}
  EnvironmentName - {{EnvironmentName}}
  ResultStatus - {{ResultStatus}}
Step 4: Configure Alert Group in Retrace
Webhooks can be used in any notification group you have configured. For instructions on how to configure notification groups, follow the documentation at Alerts & Notifications.
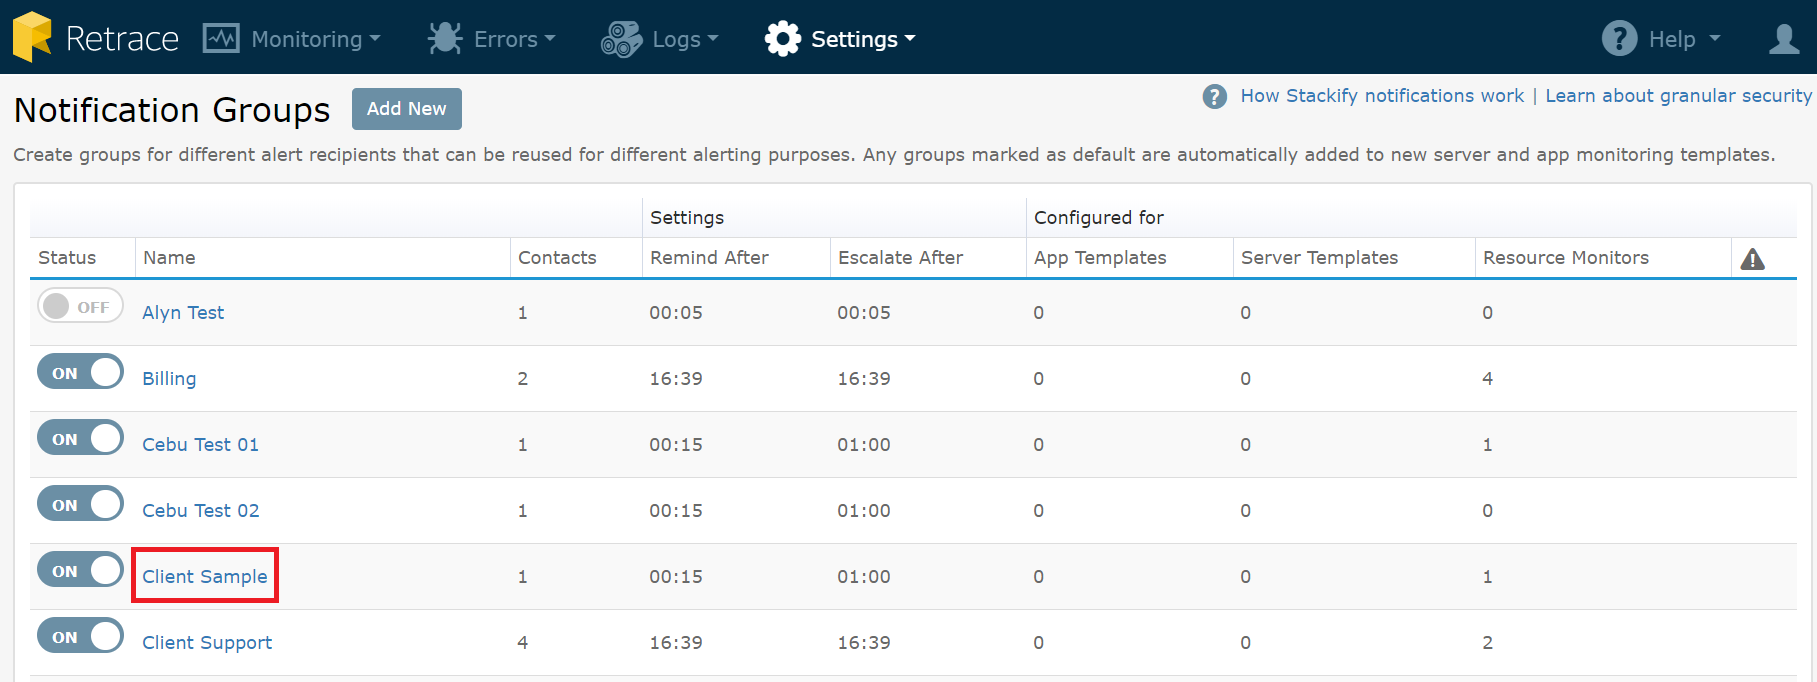
Once you are done with the process, click on the newly created notification group name. In here, we used the Client Sample as an example.
Click the Contact tab and click on the Add Contact button. Click on the Webhook name that you created earlier.
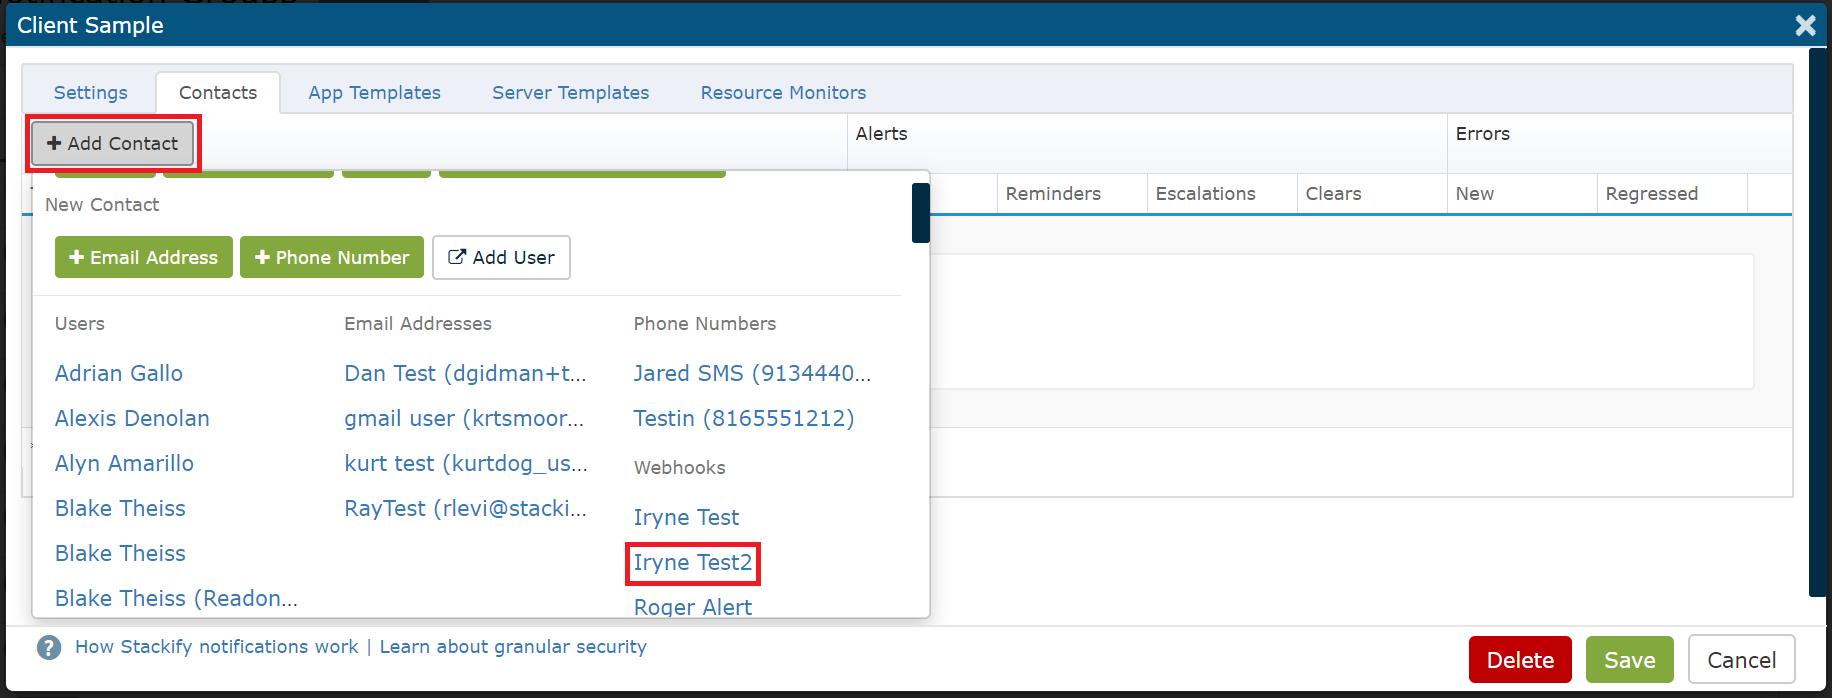
The webhook is added, and you can configure its alerts by selecting the webhook option as shown below and click Save.
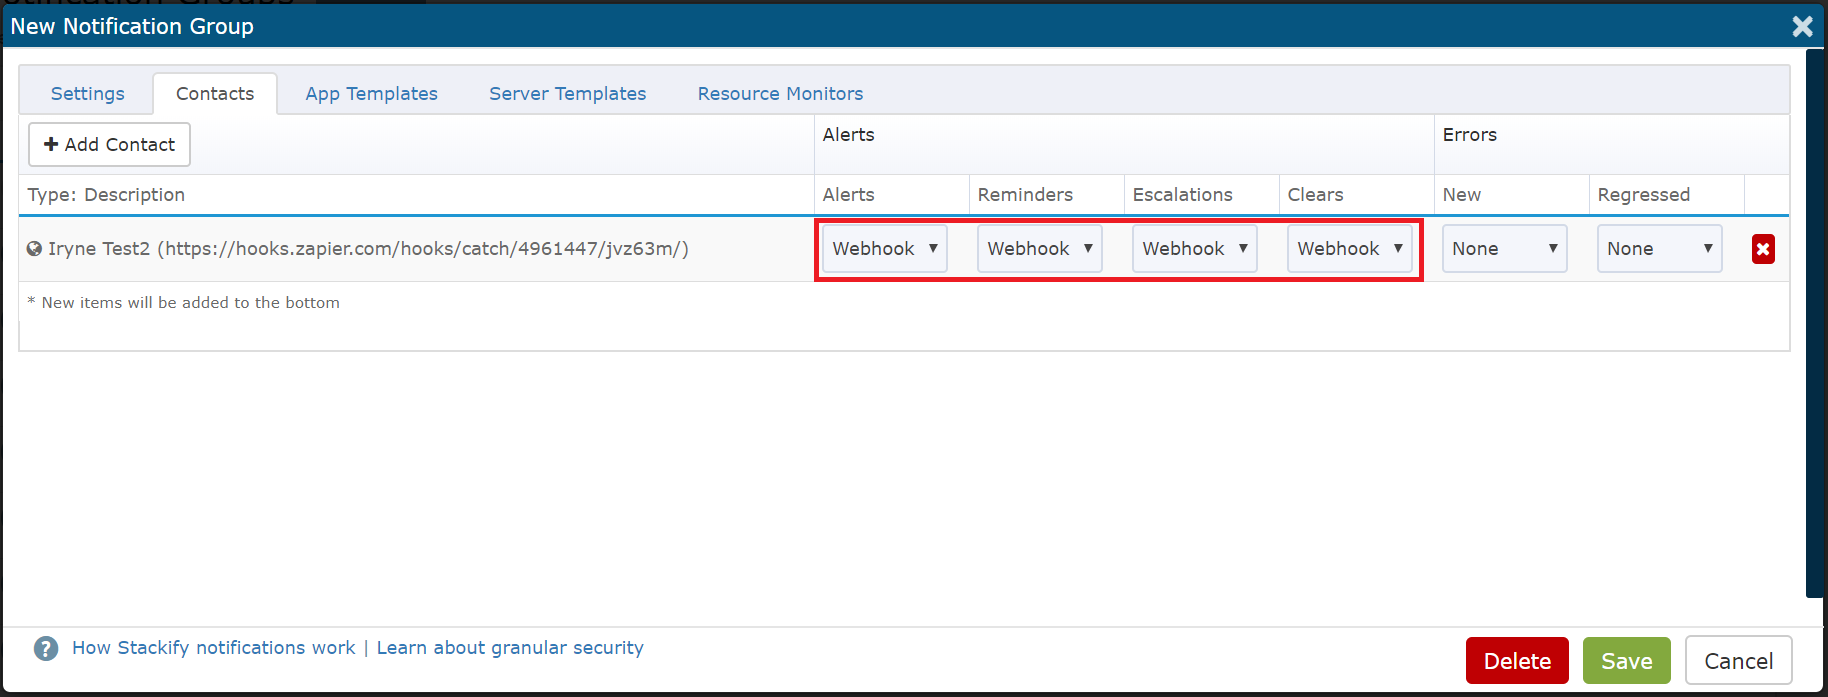
It will show a notification that it has been saved.
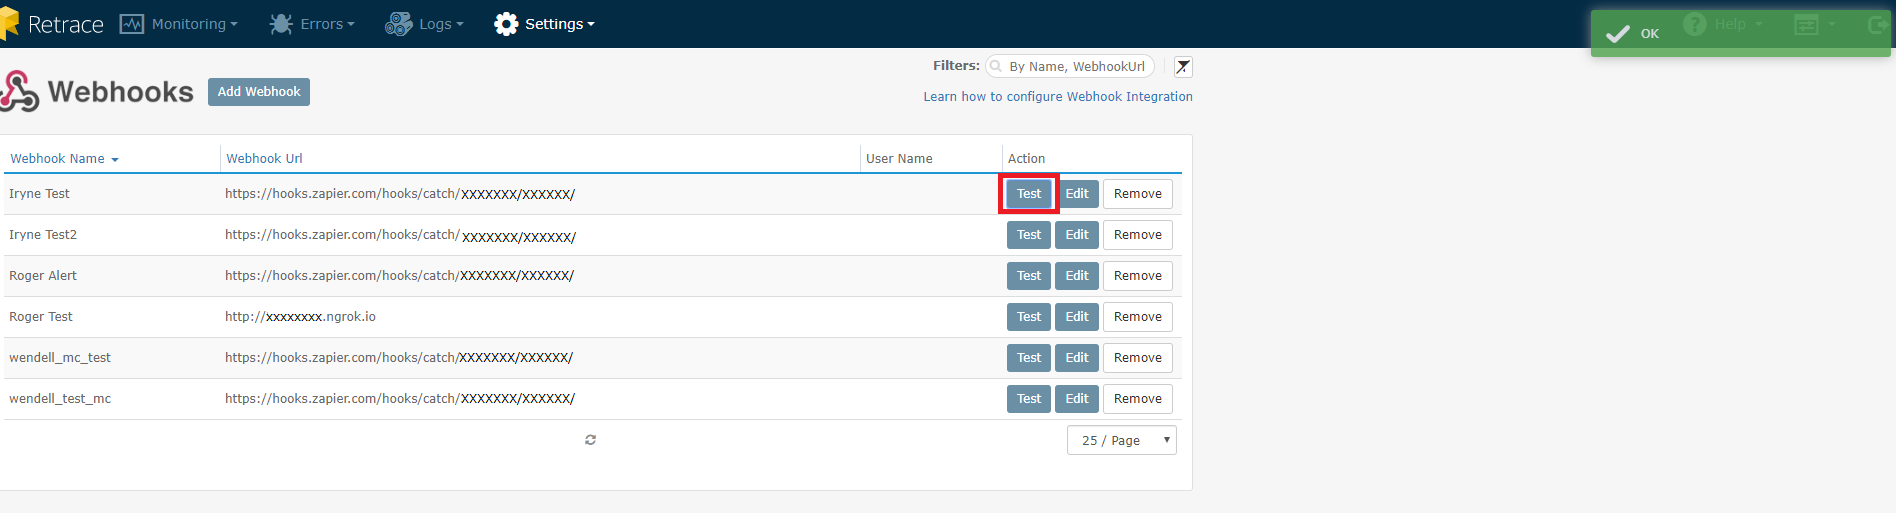
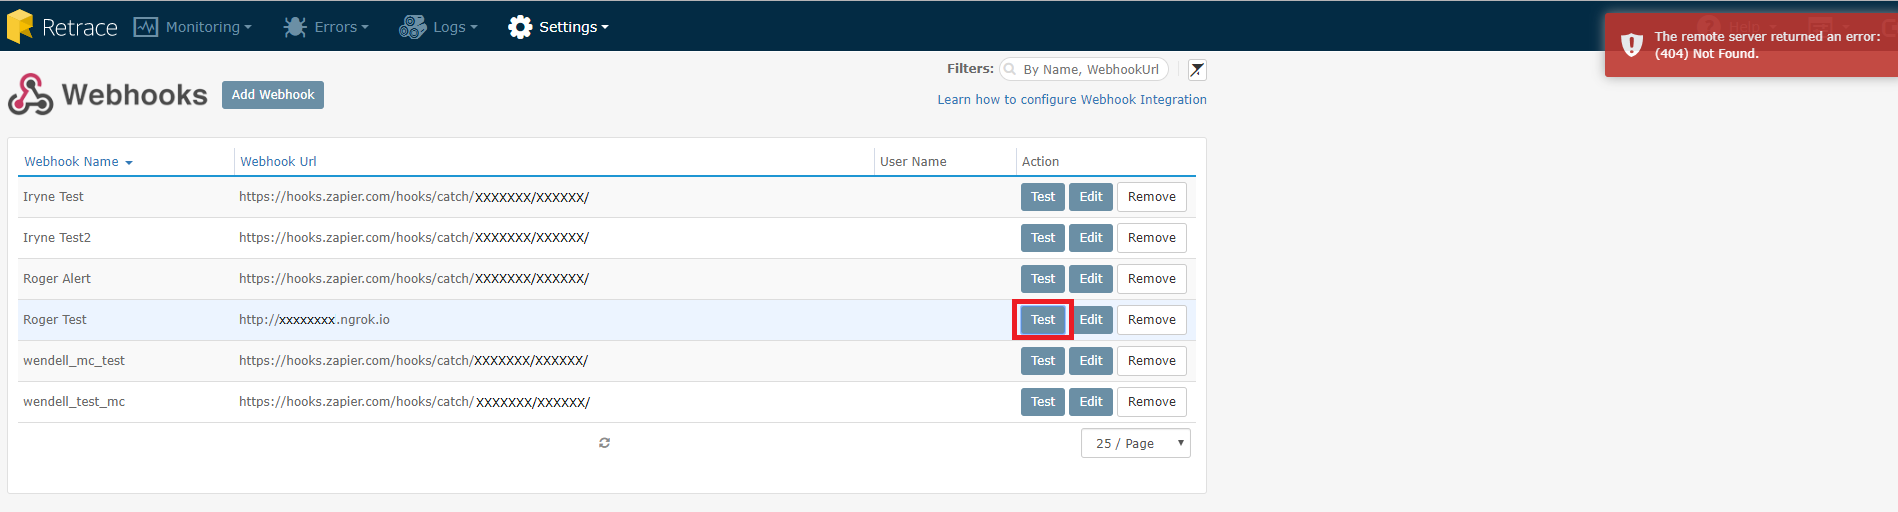
Testing the Webhook
To test if a Webhook has a valid endpoint defined, click the Test button. A valid URL returns an OK result, otherwise, it will return an error.
Verifying the Webhook
You can verify if the webhook integration is working once the intended destinations receive the details of the alerts or error notification from Retrace.
You can also use curl, postman or other tools to post sample payloads to the webhook endpoint to test and refine your integration.
Was this article helpful?