Our Windows monitoring agent is a .NET application that runs as a Windows Service on your server. Retrace is supported on Windows 2012 R2 and newer and is installed via a simple Windows installer.
The Stackify Windows Agent for Retrace requires a minimum of .Net FullFramework v4.6.2 to run. If you are running Windows Server 2012 R2, our agent will automatically install it and initiate a server reboot.
The Windows installer also installs our .NET profiler and it will automatically profile IIS web applications.
Installing via Command Line
The Retrace installer can be used via command line. This is useful for automating deployments with things like Chef, EC2, Azure Cloud Services, and other scenarios.
"StackifyInstallFile.exe" /s
   /v"ACTIVATIONKEY=ENTER_YOUR_KEY_HERE ENVIRONMENT=\"ENTER_ENVIRONMENT_HERE\"
   ENABLEPROFILER=1 RESTARTIIS=1 NEWPROFILER=1 ATTACHALL=0
   /qn /l*v .\Log.txt"
Command line arguments:
- ACTIVATIONKEY - This is your Retrace license/activation key
- ENVIRONMENT - The name of your deployment environment. Prod, QA, etc
- ENABLEPROFILER - This should be a 1 or 0. If you want to profile the performance of your .NET applications, this should be set to a 1.
- RESTARTIIS - Retrace's .NET profiler will not work until IIS is restarted after installation. Set this to a 1 to have Retrace automatically restart it, or set it to 0 and manually restart IIS yourself.
- ATTACHALL - This must be set to a 1 if you want to use Retrace with .NET Core or Windows Services. It is not required for ASP.NET full framework applications running in IIS.
- NEWPROFILER - Should be set to 1 to use the new profiler.
If you wish to install the agent on a server remotely, you can script the installation like this:
Start-Process $file -ArgumentList '/s /v"ACTIVATIONKEY=ENTER_YOUR_KEY_HERE ENVIRONMENT=\"ENTER_ENVIRONMENT_HERE\"
ENABLEPROFILER=1 RESTARTIIS=1 NEWPROFILER=1 ATTACHALL=1 /qn /l*v C:\StackifyInstallLog.txt"' -Wait
Install Manually
Download the installer
Run the downloaded installer and follow the installation steps below.
1. Enter Your Account's Activation Key
You will be prompted for an Activation Key. This key identifies your server as belonging to your company.
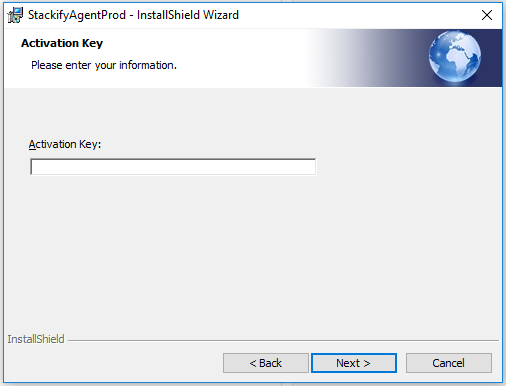
You can find your Activation Key from your Account Info page within Retrace.
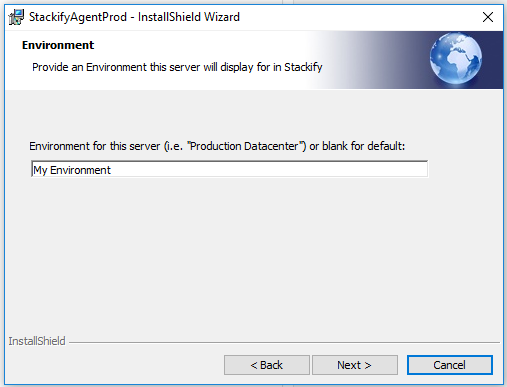
2. Set The Server Environment
For each server, you will be prompted to set the Environment. This is a way of grouping your servers based on production environment, location, client, etc. Most commonly used as Prod, QA, etc.
3. Choose Features To Enable
Enable Retrace for IIS and Java
Selecting this feature automatically discovers all .NET applications that are hosted within IIS and begins monitoring them.
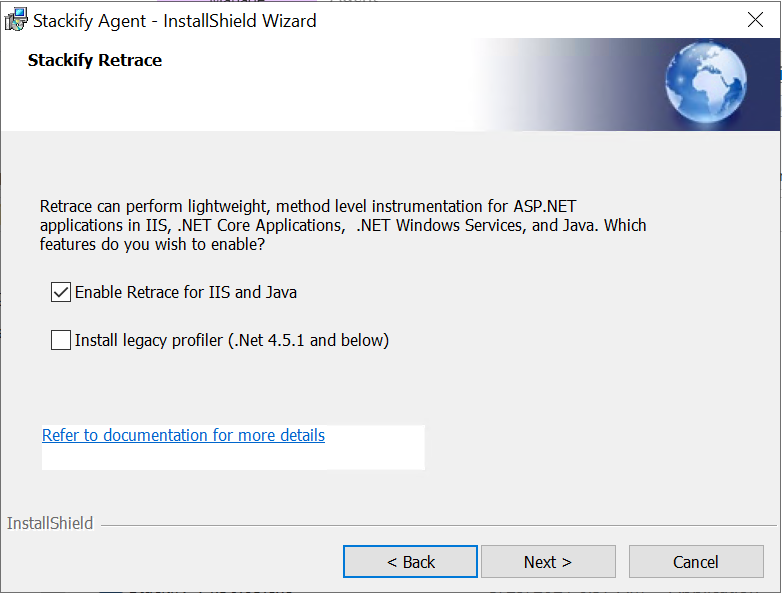
Install Legacy Profiler (.NET 4.5.1 and below)
See Legacy .NET Profiler Guide for more information
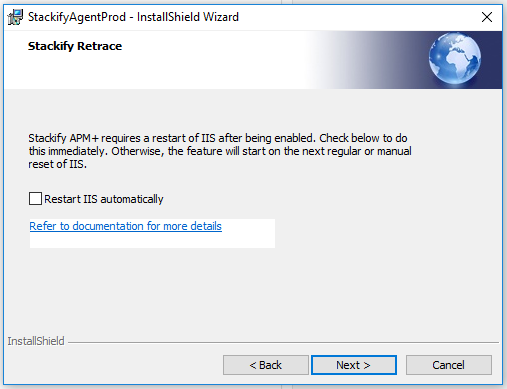
4. Choose When to Restart IIS
Select this option to restart IIS immediately after installation of the .NET agent, which may be unwanted for Production servers. You can still begin monitoring, but you will not receive any APM data until IIS is restarted.
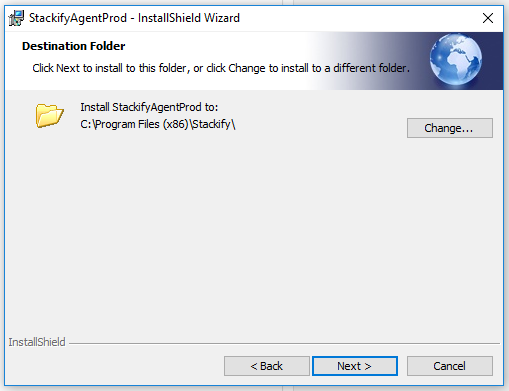
5. Select The Destination Folder
The default installation folder for the Retrace agent is C:\Program Files (x86)\Stackify. Changing this path may create issues with certain features, such as agent updates. Leave the default setting.
The installation should register two services named Stackify Monitoring Service and Stackify Health Service that automatically start with Windows.
Viewing your Servers
When the agent installation process is completed, login to Retrace and view your server under the Server Monitoring page!.
Check out this Troubleshooting Guide