- Supported Java Technologies
Since Prefix and Retrace share the same modules/profiler, the supported frameworks between the two products will be the same in most cases.
1. Download and install the Prefix executable file:
Prefix uses a simple installer and takes just a couple minutes to install.
Check out the Getting Started Prefix page to download and install Prefix on your workstation.
2. Get the latest Stackify Java Profiler for Prefix:
https://download.stackify.com/stackify-java-apm/stackify-java-apm-latest.tar.gz
3. Extract the profiler:
Extract the tar.gz file to extraction directory: (example: \ProgramData\Stackify\Profiler) and run the install.sh file.
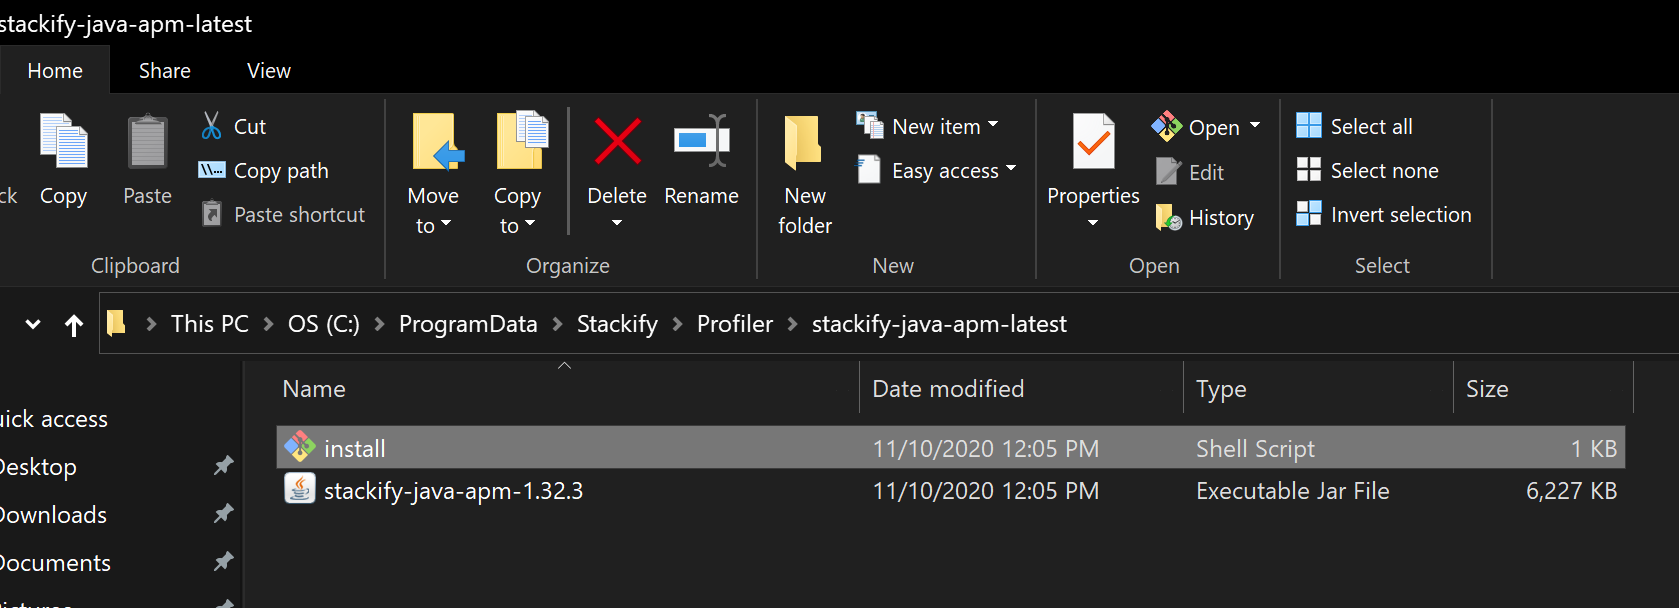
This install.sh script will create a jar file named "stackify-java-apm.jar" that you will reference in your web server's configuration.
Alternatively, you can reference a specific version of the profiler (e.g. "stackify-java-apm-1.32.3.jar")
4. Reference the jar file:
Make note of the path to the jar file extracted in step 3. In most default cases, [Path_to_Jar_File] should be
C:\ProgramData\Stackify\Profiler\stackify-java-apm-latest\
Below are instructions on how to set up the Java profiler for Prefix in the various supported containers/web servers:
- Tomcat
Modify the catalina.bat file located in the installation folder of Tomcat:
set CATALINA_OPTS=%CATALINA_OPTS% -javaagent:"[Path_to_Jar_File]\stackify-java-apm.jar"
Note: If running Tomcat as a service, you can set a similar argument to the jar file as in Java Options in the Apache Service Manager:
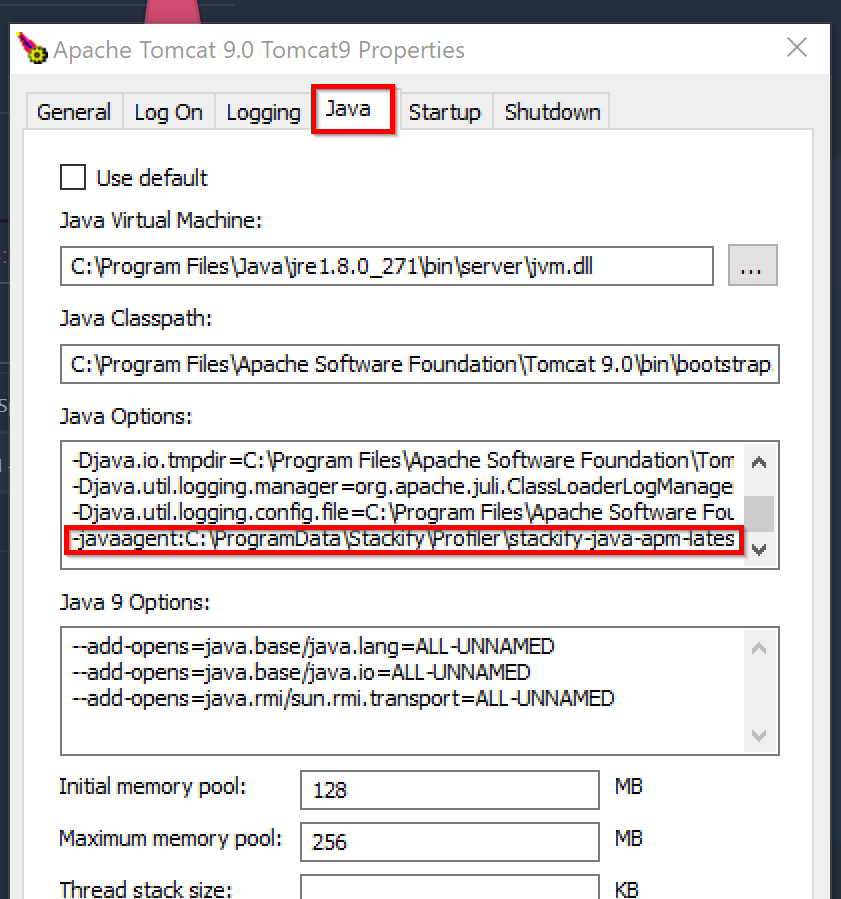
-javaagent:"[Path_to_Jar_File]\stackify-java-apm.jar"
- Wildfly / JBoss
Modify the standalone.conf.bat file:
set JAVA_OPTS=%JAVA_OPTS% -javaagent:"[Path_to_Jar_File]\stackify-java-apm.jar"
For JBoss AS7, you also need to include an additional parameter on JAVA_OPTS:
JAVA_OPTS="$JAVA_OPTS -javaagent:"C:\Program Files (x86)\stackify\java\lib\stackify-java-apm.jar" JAVA_OPTS="$JAVA_OPTS -Djboss.modules.system.pkgs=com.stackify.apm"
-
Jetty
Include the following line to the Jetty start command between java and -jar %JETTY_HOME%/start.jar:
-javaagent:"[Path_to_Jar_File]\stackify-java-apm.jar" -
Glassfish
Add the following line to the java-config section of the Glassfish domain.xml file:
-javaagent:"[Path_to_Jar_File]\stackify-java-apm.jar" -
WebSphere
Create a text file named jvm.options under WEBSPHERE/usr/servers/SERVER with:
-javaagent:"[Path_to_Jar_File]\stackify-java-apm.jar"
Depending on your preferences, you may configure a single JVM or all Liberty JVMs with your options file.
To apply these settings to a single server, save jvm.options at ${server.config.dir}/jvm.options
To apply these changes to all Liberty JVMs, save jvm.options at:${wlp.install.dir}/etc/jvm.options. This will take effect for all JVMs that do not have a locally defined jvm.options file.
-
Play Framework 1.2.x - 1.4.x
Before running your application, enter the following command:
export JAVA_OPTS='-javaagent:"[Path_to_Jar_File]\stackify-java-apm.jar"' -
Play Framework 2.x+
Run the application with the following argument:
-J-javaagent:"[Path_to_Jar_File]\stackify-java-apm.jar"
5. Restart the Web Server and Prefix Service