When using Visual Studio Team Services you can create a Release definition during the process of creating this definition you can add a Task to the Agent phase (Run on agent) to notify Retrace of your deployments status. Do not use the script on a Deployment group as this will invoke the script once for each Agent in that group and we only want to send one notification.
Bash and Powershell
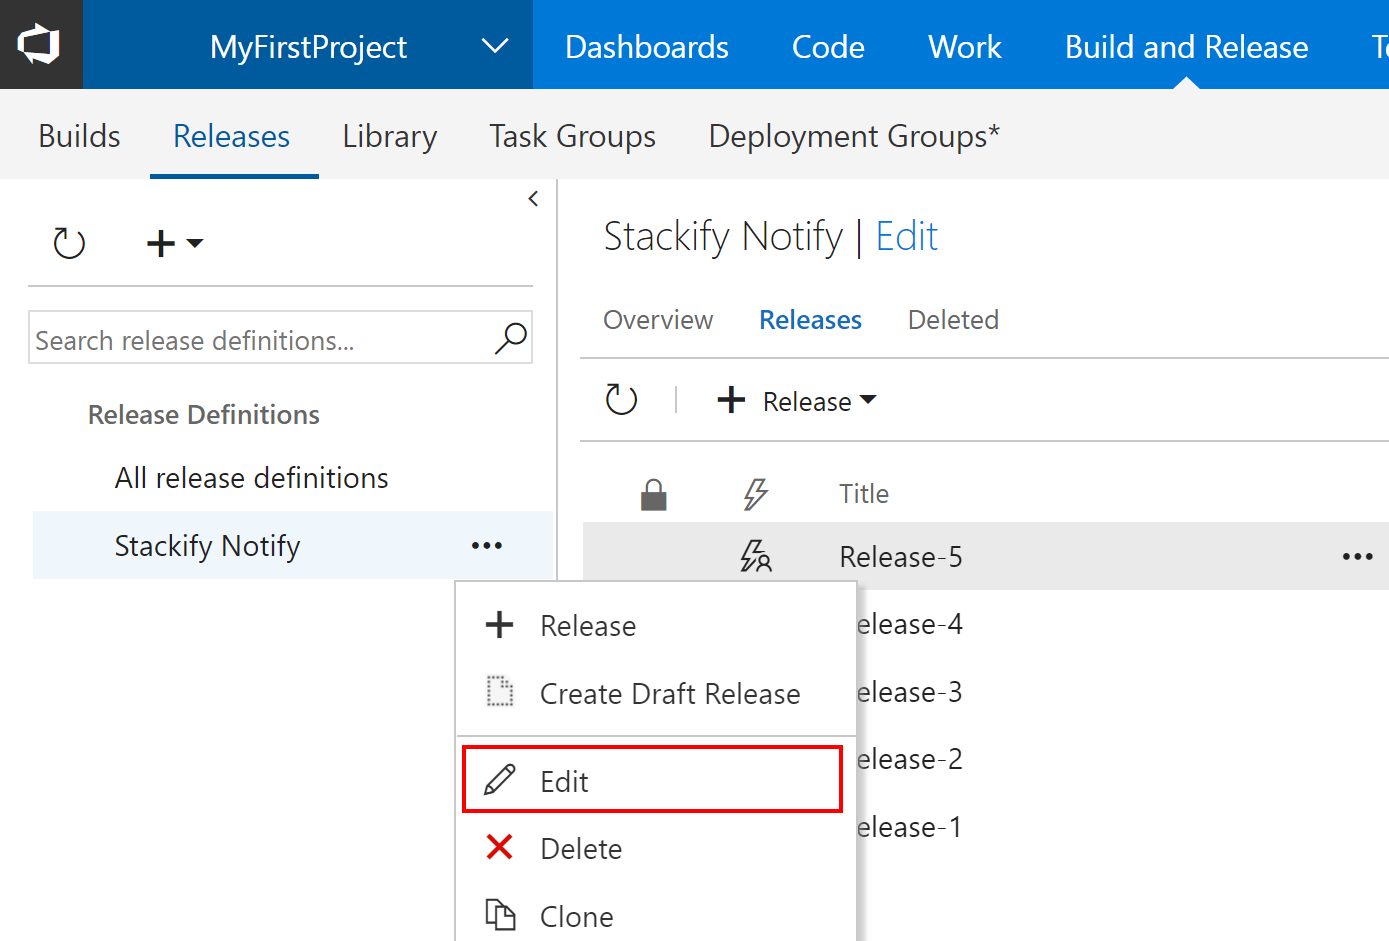
- Edit or Create a Release Definition
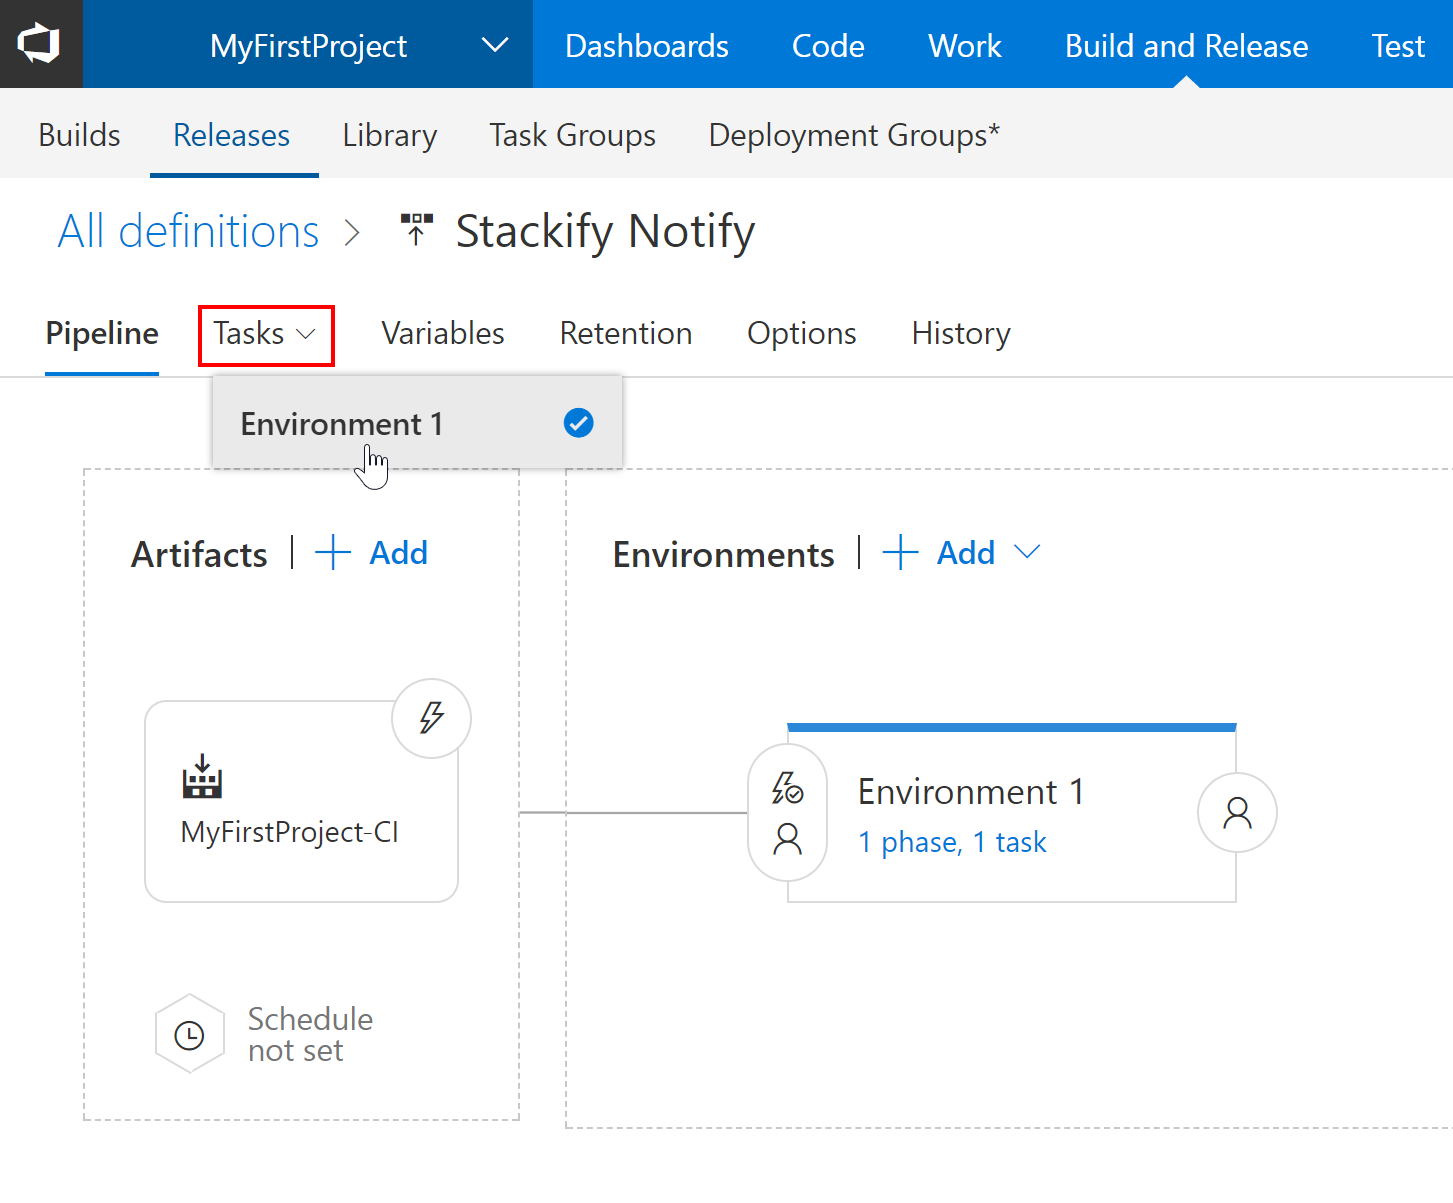
- Add or Edit an Environment then go to Tasks >
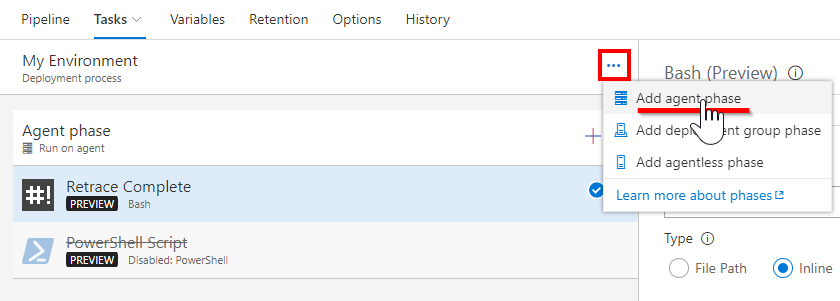
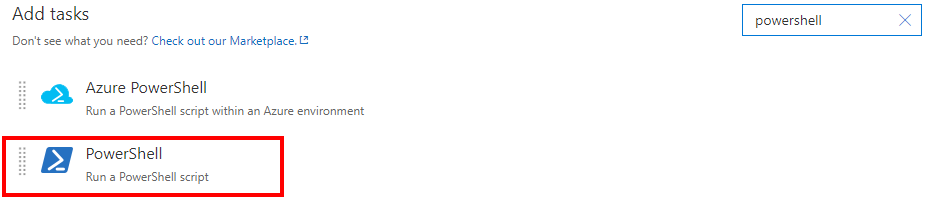
- Here you can add an Agent Phase. We will be notifying our API of a Deployment Complete. You can find Bash and Powershell examples here.

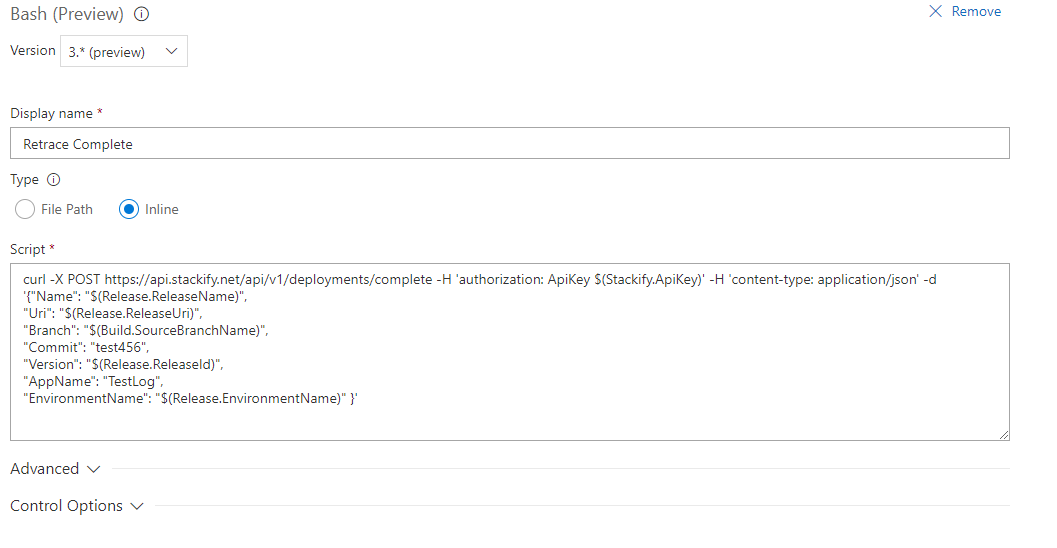
- Using the 3.* Version of the Bash Task you can add this script substituting your own variables in to make the call.

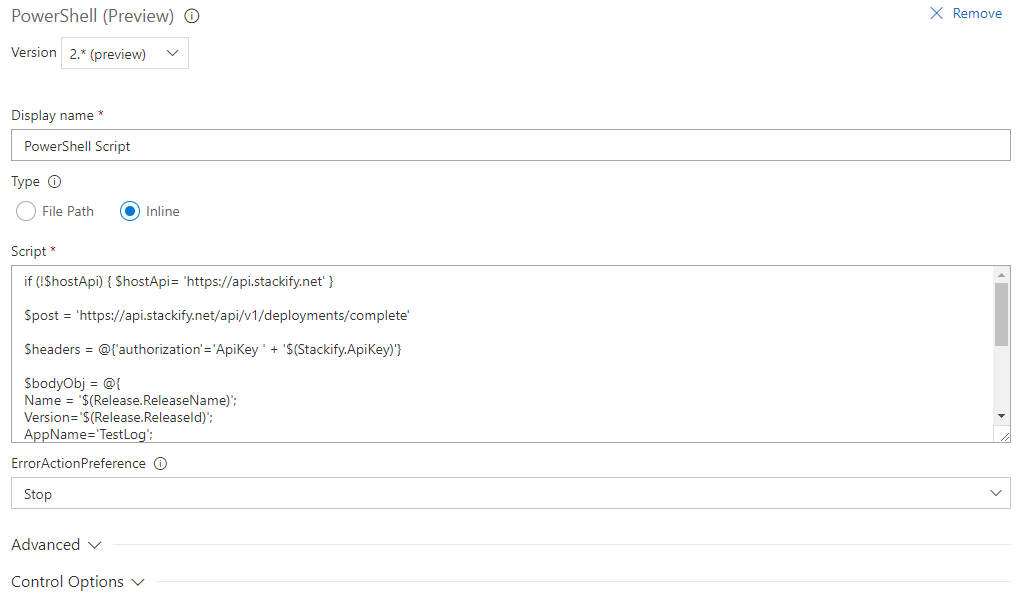
- Using the 2.* Version of the Powershell Task you can add this script substituting your own variables in to make the call.
- Depending on the status of the deployment you can change the url endpoint to match the action. start/complete/cancel are the three different actions currently available. By using only Complete you will get the maximum feature set. Using Start and Complete will allow you to also get a Start and End time of your deployment in the Retrace Deployment Requests tab.
Using VSTS Variables
VSTS has two groups of variables that can limit the user from having to enter in redundant information. Below is an example of using some Microsoft System Variables to help reduce the amount of script editing needed. You will need to set up a Custom Variable for the $(Stackify.ApiKey) in order to use it in the script. We recommend creating a variable group in the Build and Release > Library section so you only have to paste your ApiKey in once. Learn more about Custom Variables here.
Powershell
if (!$hostApi) { $hostApi= 'https://api.stackify.net' }

$post = 'https://api.stackify.net/api/v1/deployments/complete'

$headers = @{'authorization'='ApiKey ' + '$(Stackify.ApiKey)'}

$bodyObj = @{
Name = '$(Release.ReleaseName)';
Version='$(Release.ReleaseId)';
AppName='Your_AppName';
EnvironmentName='$(Release.EnvironmentName)';
Uri = '$(Release.EnvironmentUri)';
Branch = '$(Build.SourceBranchName)';
Commit = '$(Build.SourceVersion)';
}

$body = ConvertTo-Json $bodyObj

# send the request
Invoke-WebRequest -Uri $post -Method POST -ContentType "application/json" -Headers $headers -Body $body -UseBasicParsing
Bash
curl -X POST https://api.stackify.net/api/v1/deployments/complete -H 'authorization: ApiKey $(Stackify.ApiKey)' -H 'content-type: application/json' -d '{
"Name": "$(Release.ReleaseName)",
"Uri": "$(Release.ReleaseUri)",
"Branch": "$(Build.SourceBranchName)",
"Commit": "$(Build.SourceVersion)",
"Version": "$(Release.ReleaseId)",
"AppName": "Your_AppName",
"EnvironmentName": "$(Release.EnvironmentName)" }'
Note: When using Release.ReleaseName and Release.ReleaseId. ReleaseId will increment if a draft is created while the default use of the "Release-$(rev:r)" as the Release name will not increment based on a draft being created.