- 2 Minutes to read
- Print
- DarkLight
- PDF
.NET APM with Elastic Beanstalk
- 2 Minutes to read
- Print
- DarkLight
- PDF
To use Retrace with Elastic Beanstalk, the Retrace monitoring agent must be installed on the server and our .NET profiler must be enabled.
To get Retrace working with Elastic Beanstalk you need to do 2 things:
- Configure an Elastic Beanstalk extension file to automatically install the Retrace agent
- Configure your Stackify Properties by setting the values in the Stackify.config file or in your EBS portal Environment Properties.
- OPTIONAL: Setup a lambda script to handle removing servers in Retrace when you scale down or terminate instances
Step 1: Configure the Elastic Beanstalk Extension to Install Retrace
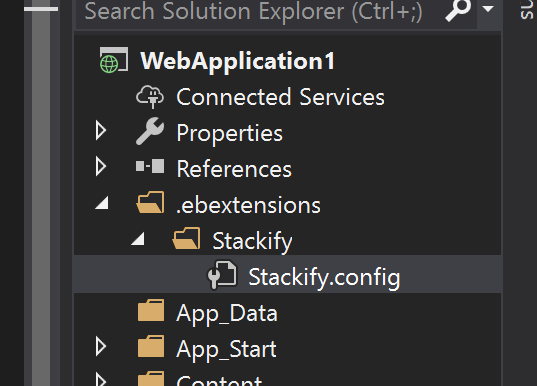
Within your application you need to create a Stackify.Config file.
Create a file under this file path within your project:
\.ebextensions\Stackify\Stackify.config

After you create the file, copy the text below in to your Stackify.config file. This will configure your Elastic Beanstalk server to automatically install our agent.
files:
  "C:\\StackifyInstall\\Install.cmd":
    source: https://agents.stackify.com/aws-install-scripts/Install.cmd
  "C:\\StackifyInstall\\Install.ps1":
    source: https://agents.stackify.com/aws-install-scripts/Install.ps1
container_commands:
  stackify_install:
    command: Install.cmd
    cwd: "C:\\StackifyInstall"
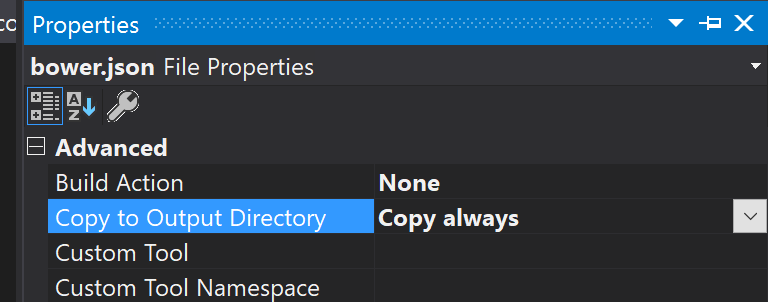
After creating the Stackify.config file, make sure you set the file properties to Copy Always.

Step 2: Configure the Stackify Properties
You have 2 methods of setting the required property values in order for the agent to authenticate with your account and allow the profiler to run so that APM data gets created. These options include setting the properties within the EBS portal (option A), or setting them directly within the configuration file you created in Step 1 (option B).
Option A: Setting the Properties in the EBS Environment Properites Section
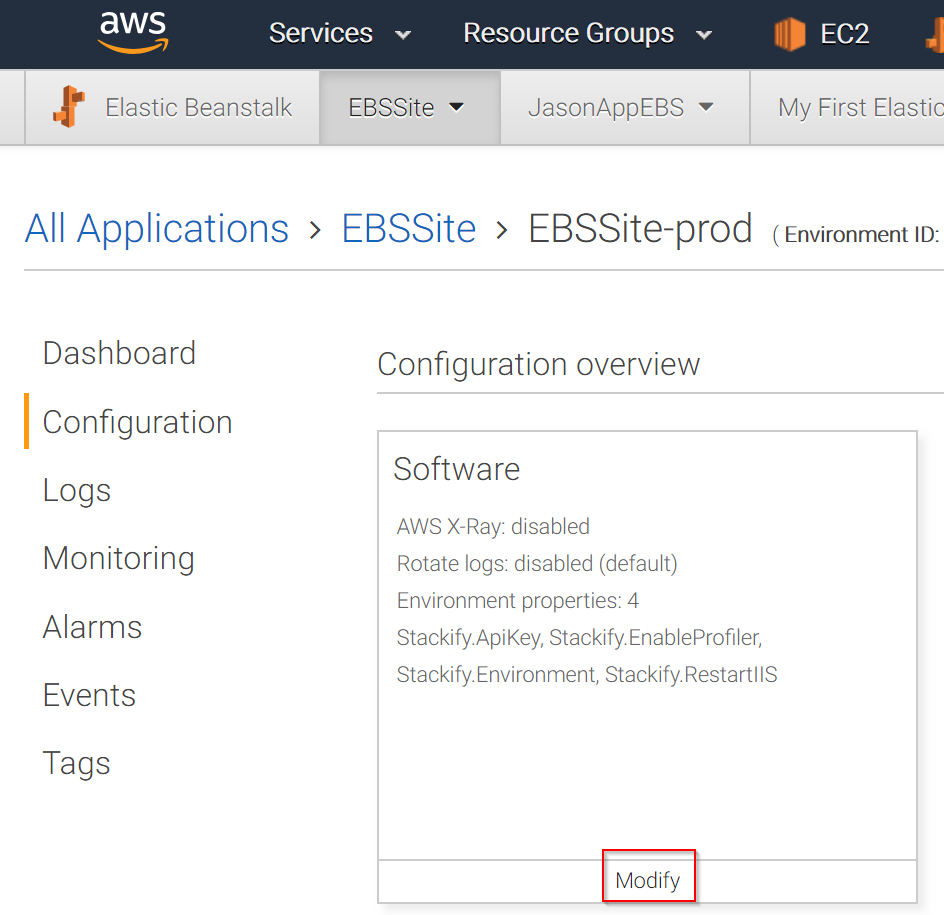
In this option you will set your Stackify values in the EBS portal by clicking on Configuration>Software>Modify>Environment Properties


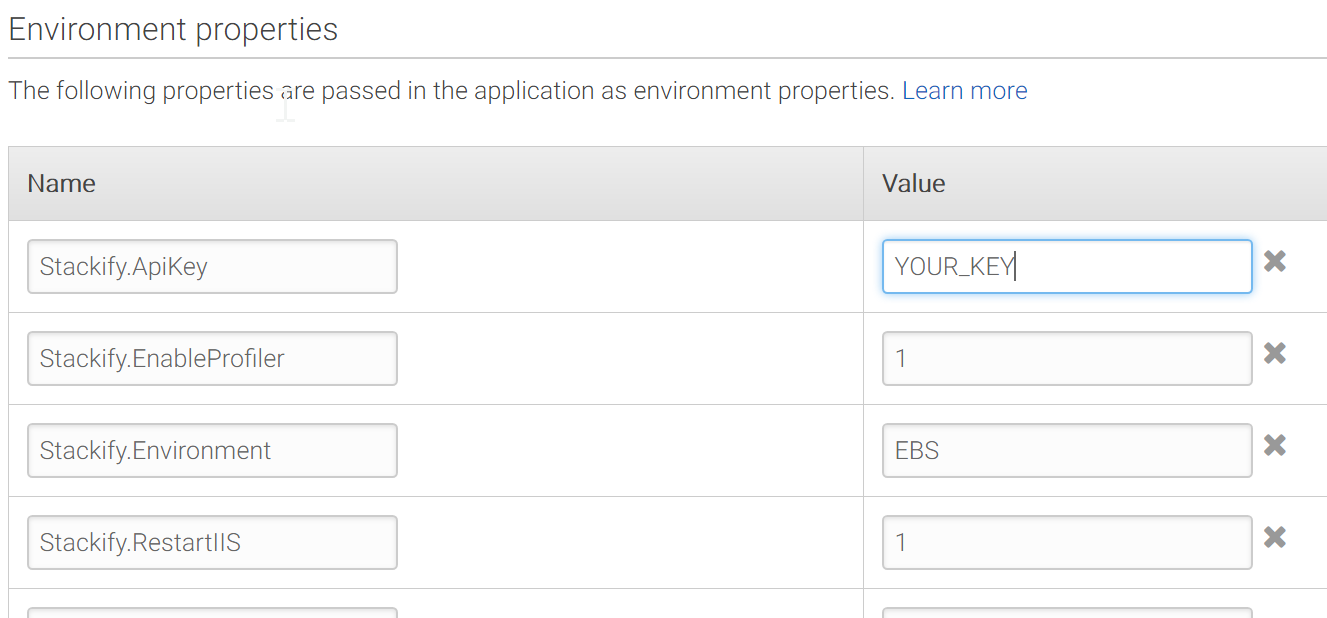
The following settings can be set in the Environment Properties of the EBS portal:
| Key | Value | Notes |
|---|---|---|
| Stackify.ApiKey | YOUR_ACTIVATION_KEY | |
| Stackify.EnableProfiler | 1 or 0 | Set to 1 to enable APM profiling |
| Stackify.Environment | YOUR_ENVIRONMENT | |
| Stackify.RestartIIS | 1 or 0 | Required to be set to 1 for APM |
Option B: Setting the Properties in the Stackify.config file
In this option you will set the Stackify properties in an "option_settings" section directly under the installation script of the Stackify.config file you created in Step 1. Below is what the config file should look like with the option_settings section added:
files:
  "C:\\StackifyInstall\\Install.cmd":
    source: https://stackifyprodwest.blob.core.windows.net/aws-install-scripts/Install.cmd
  "C:\\StackifyInstall\\Install.ps1":
    source: https://stackifyprodwest.blob.core.windows.net/aws-install-scripts/Install.ps1
container_commands:
  stackify_install:
    command: Install.cmd
    cwd: "C:\\StackifyInstall"
option_settings:
  - option_name: Stackify.ApiKey
    value: YOUR_KEY_HERE
  - option_name: Stackify.EnableProfiler
    value: 1
  - option_name: Stackify.Environment
    value: Production
  - option_name: Stackify.RestartIIS
    value: 1
Step 3: Setup Automatic Removal of Terminated Servers
To properly remove servers when you redeploy or scale down, you will want to setup our lambda script to automatically handle this. This only needs to be done once for Retrace. If you have 100 apps, it still only needs to be done once.
Check out this article to handle scaling events: Auto Scaling Events in AWS

